Navigation Pages

Thursday, September 25, 2014

Friends - Cabinet Building and Reuse

Here's a recap of the remodel of my friends' laundry room/back entrance


My friends, Lu and Chris, started out with a very dark interior.  I helped them with plans to freshen up the space and to build some cabinetry to include a cabinet with shelving and a litter box house on each side of the cabinet in the initial post for this challenge.

Before any work started

Lu and Chris finished the drywall in this post.  The plywood backing was put in place of the drywall in this section where we plan to build the cabinet and shelf unit.  It will give us a strong surface to anchor the shelf to the wall.

Rough sketch of the plan
The next phase involved flooring and painting the walls and the ceiling.  Painting the moldings and trim is yet to come.  These creative litter box houses will be replaced with fresh white sturdy cabinets that will also serve as window seats for both the cats and home owners.


On to the latest phase 


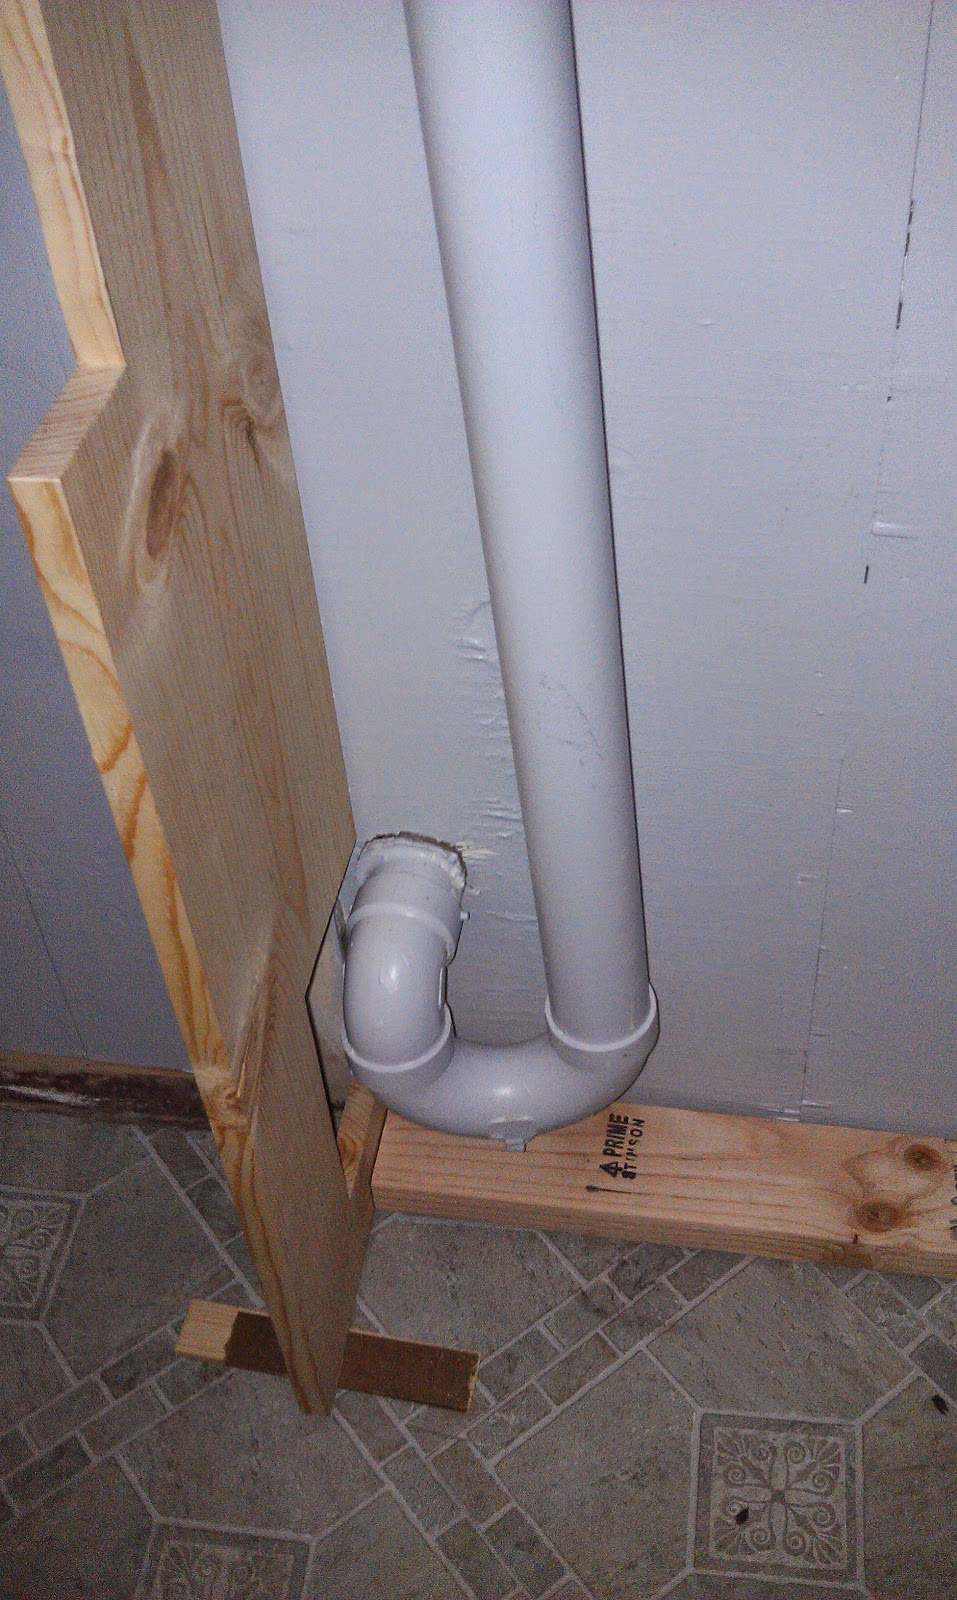
We began by building a shelving unit behind the laundry area.  Chris and Lu did not want to use a bunch of anchors on the wall for free floating shelves as there was no easy way to know exactly what is behind the wall.  To eliminate bad household accidents, Chris came up with a design that was basically free standing.  We had to make some alterations to allow room for the dryer vent, drainage pipes, and hoses.  The bottom shelf had to be higher than we wanted it to be due to the height of the plumbing work.  We did make this shelf removable in case work had to be done on the faucets.  We used 1x10 pine boards.  These will be painted.
 

After painting and adding two brackets to ensure it will not topple forward when pulling on heavy laundry detergent containers, my friends have a useful shelf with a fresh color.  The depth of the shelves were specifically designed to allow the spouts for the detergent and softener to hang over the edge - something Lu would not budge on!
Before:

After:


After the paint dried Lu found that items on the shelf ended up sticking to the paint.  To prevent this, she covered the shelves with clear contact paper.  Very ingenious!  I'm going to use this on my office shelves, as I'm having the same problem.

With the washer and dryer now hooked up, we moved on to the wall where the litter boxes will be housed and the main storage unit built.  This storage unit will contain 2 laundry bins and various tools and materials and supplies that don't have a place in other areas of the home.  We built a box using 3/4 pine plywood.  We placed two 2x4's on the floor, two cabinets from IKEA and the newly built cabinet on the 2x4's to see what it would look like with a toe kick.

One cat has claimed her space
What we ended up with was a teeter totter!  We knew the floor had a slope that my friends chose to keep mostly because they would have lost up to 4 inches of height to the room.  They are at least 6 feet tall, so this is important!

We decided to build a base for each of the three cabinets and see how we could adjust.  After attaching the cabinets to the base and bolting the IKEA cabinets to the newly built cabinet, we continued to have problems with squaring the new cabinet, awkward gaps between the cabinets, and with teeter tottering.  We finally decided to remove the backing and the top of the new cabinet and allow the sides to slope slightly outward so the IKEA cabinets would rest on the floor.  We cut a new wider top and added shims for additional support where needed.  Problem solved.  These three cabinets took up about 5 hours.  Isn't DIY fun?...Yes, of course!


This was a good place to stop.  Lu will be painting the new cabinet the same color as the shelf over the laundry area.  Chris will be reinstalling the trim in that same color.  When we meet next we will hopefully add the doors and the shelves over the new cabinet.  We will have another storage unit to build, then the pretty stuff can begin - seat cushions, window coverings, and other accessories and necessities.


Friday, September 12, 2014

Friends - Floor tiles and more

My good friends, Chris and Lu, have been hard at work getting their back entrance/laundry room floor prepared for new flooring.  In my last post, they started the process by getting their existing flooring tested for asbestos.  A loyal reader asked in her comment how one would know that they should test for asbestos and where in the home can it be found.  GREAT questions!

Let me step back and tell you what 'asbestos' is.   You can read the Wikipedia  article which is quite extensive; however, the basic info to know is that it is a naturally occurring mineral that is hazardous to human health and is known to cause a type of cancer known as mesothelioma.  Yup, not good.  

One of the groups of asbestos fibers is called 'Serpentine'.  One of the minerals in that group is called 'Chrysotile'.  According to Wikipedia this mineral is found in the following products and materials:
  • Chlor Alkali diaphragm membranes used to make chlorine (currently in the USA) [2]
  • Drywall and joint compound
  • Plaster
  • Gas mask filters pre 1960s
  • Mud and texture coats
  • Vinyl floor tiles, sheeting, adhesives
  • Roofing tars, felts, siding, and shingles[47]
  • "Transite" panels, siding, countertops, and pipes
  • Popcorn ceilings, also known as acoustic ceilings
  • Fireproofing
  • Caulk
  • Industrial and marine gaskets
  • Brake pads and shoes
  • Stage curtains
  • Fire blankets
  • Interior fire doors
  • Fireproof clothing for firefighters
  • Thermal pipe insulation
  • Filters for removing fine particulates from chemicals, liquids and wine
  • Dental cast linings
  • HVAC flexible duct connectors
  • Drilling fluid additives
You'll be happy to know (being sarcastic here) that bans on the use of asbestos have been revoked over time and you can't count on it only being in homes built before 1980 as some literature indicates.  Some companies have phased out the use over time, but it is still being used today.  Asbestos becomes a hazard when it is airborne.  So the answer for when to test might be any time you plan to remodel.  Sorry, but that is your safest bet. 

I felt that all the above info was important enough to tell you and thanks to a loyal reader for asking, but I know you really want to move on to pictures and progress!  So here we go:

Color Palette


Lu picked her colors from Sherwin-Williams (Daydream SW6541 - top/Briny SW6775 - side), then picked her floor tile from Menards.  She chose to use self stick vinyl tiles for the ease of installation, but more importantly, she needed to cover a cement slab floor that was far from even and she needed a surface that will be easy to clean and withstand traffic in and out of the house.  Another big factor was that the cat boxes will be in this room presenting challenges all cat lovers endure.

It can be helpful to use your flooring choices to drive your color palette since flooring can be expensive and paint is quite the opposite.  Lu and I discussed color first because one of her main goals was to brighten up the room and paint color was going to be key.  Note the Daydream color does not appear to be as violet as it may on your screen.  A north facing window tends to dull colors, so this looks a bit lighter in Lu's room.  Briny will be used as an accent, on some cabinetry, and window trim.  Daydream is on the walls.


Tile Patterns


I found a website that shows many, many options for tile patterns and provides a way to estimate how much tile to purchase: www.southcypress.com.  Lu purchased her tile at Menards for $0.63 per tile.  She bought 3 boxes for a total of around $85 which is plenty to cover her 98 square foot space.  There are 45 pieces to each box.

What pattern do you choose with so many choices?  Of course, it will depend on the pattern already on each individual tile, whether it is solid or busy, geometric or organic, but it also can change how big or small your room appears.  Lu chose to install her tile on a diagonal which will make the room look wider upon entering it.  This website has some great tips and pictures to show you the impact a pattern can make:  www.tilehomeguide.com

Testing out a diagonal installation

Installation


Although Lu's self stick tiles do not require grout, she is entertaining the idea of grouting some gaps she noticed when all was done.  I'm recommending that she finds a non-sanded premixed grout that is flexible.  I've seen some acryllic products that are online, but I think more research is needed.  I would also recommend that she do a test on an extra uninstalled tile to ensure it doesn't discolor or otherwise damage the tile.  This website appears to have some good instructions on how to install and grout 'grout-able' vinyl flooring: www.sasinteriors.net.  Lu started her tile in one corner of the room and used paper to make templates for the partial tiles she needed on the edges and corners.  Since I wasn't there to take step by step pictures and the website mentioned above has some good detail, I won't elaborate on the process here.


I think this is coming along nicely, don't you?  This hasn't been easy.  Lu has been working through this renovation with 2 injuries to date - Burn blisters on her fingers from a fire pit mishap and 2 very large swollen bruises on her right shin from playing with her granddaughter - yet she is determined to get this done.  Yay, Lu!

On this cold, rainy, and dreary day in Wisconsin, I invite everyone (especially Lu) to sit back, relax, and enjoy...

christmas animated GIF
See you in two weeks!