Our shower remodel continues. I'm planning on doing the tiling job myself, so we decided to buy a small wet saw to cut our ceramic tiles. It is like a table saw, but it sprays water so the blade and tile do not overheat.
What it also does is give the operator a shower of both water and ceramic dust. My safety glasses proved their worth - they are now extremely scratched up from the cutting I did for the shower floor tile. I was pretty well soaked from head to knees as I had the saw on a very low table out on our patio. Thankfully, I didn't attempt its use indoors.
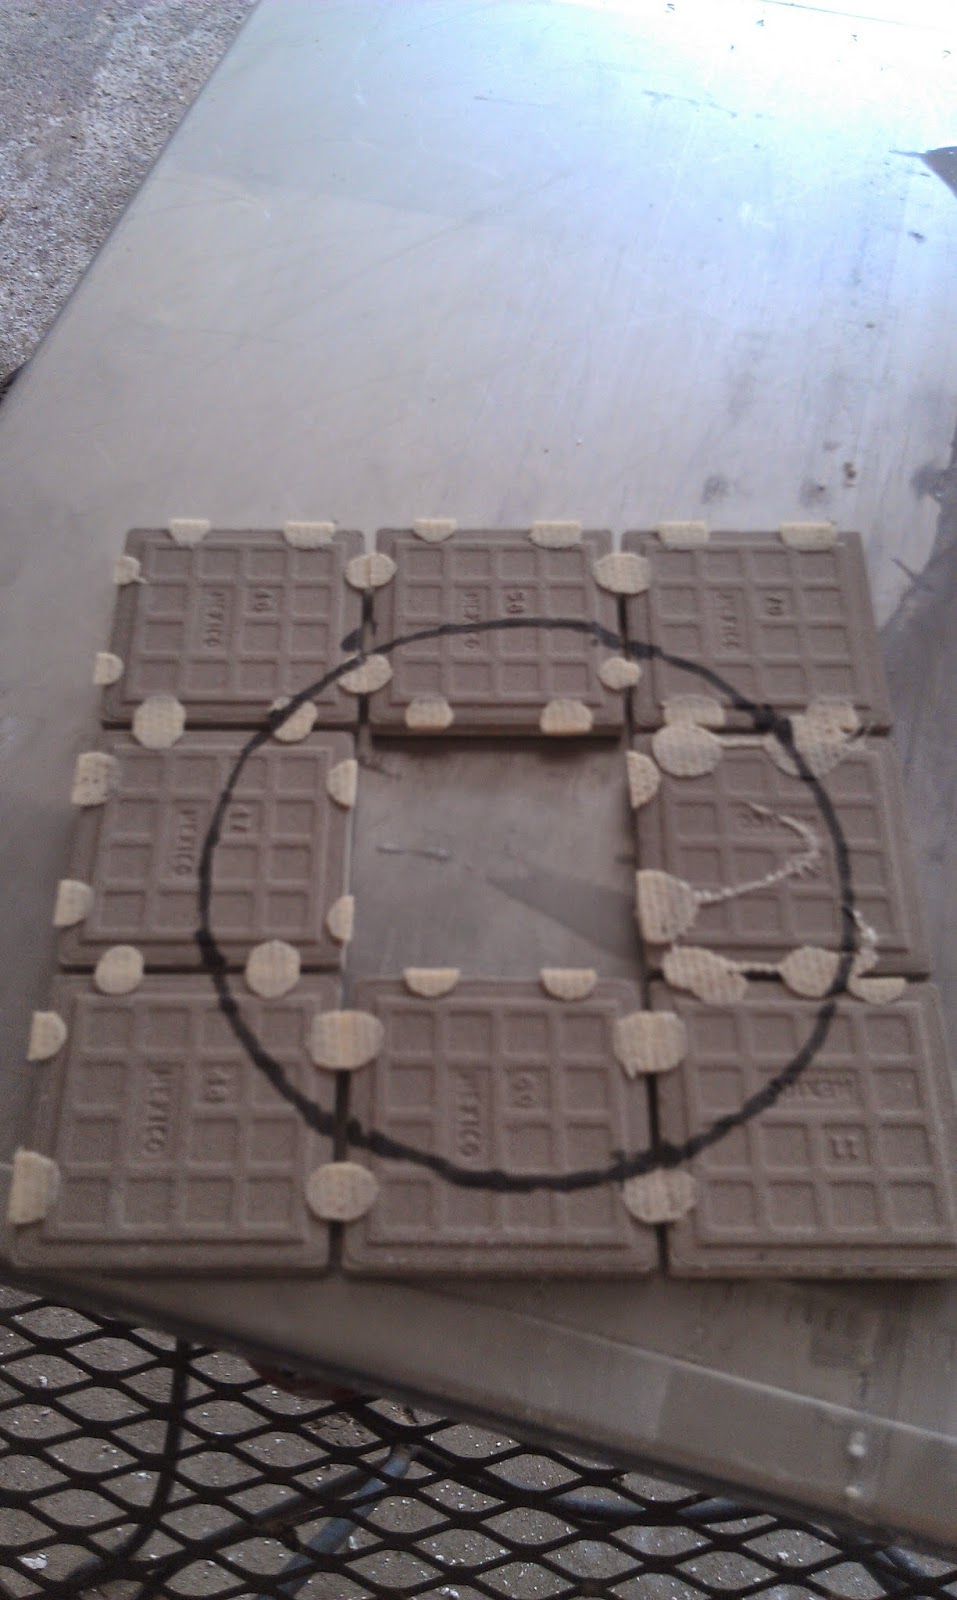
I laid out our floor tiles while in the process of making cuts to ensure they would fit. I left the middle open by the drain which is covered in blue painter's tape. I need to attempt a circular cut for that area and I'm a bit nervous that it won't go well.
Our shower base guy suggested the use of a grinder (pictured below) which we purchased to help us demolish the old tile. I set up my tile sheet clamping it on a wood block to hold it in place.
The circle marks the spot! I need to carefully cut this out.
After grinding, I thought I came close with a few tiles needing replacement and re-cutting.
Flipping the tile sheet over, it shows a very rough circle which just won't work for me.
I cut out the broken tiles and decided to lay the rest and deal with the circle the next day. I do have one more sheet, so I have a few attempts to get it right.
To adhere the tiles to the cement floor, I chose an already mixed mortar so I didn't have to deal with mixing it myself. It turned out to be a great product that held the tiles well in a short time. I didn't need any
spacers or tape to prevent my tiles from slipping out of place.
 |
| Here is the last time I hope to see that cement floor bare... |
I used a 1/4 inch
notched trowel to spread and comb through the mortar before laying the tile sheets and pieces to form my new shower floor. The 2" x 2" tiles are the same we had before. I had a few sheets saved. The 2" x 4" accent tile were purchased from Home Depot for about $7.00 a sheet. I used about 5 or 6 sheets. (Too tired to go and check my leftover box for an accurate count!)
Now we wait for it to dry. I'm supposed to wait 24 - 72 hours before grouting and walking on it, but I really want to start tiling the walls tomorrow. Hmmm...

The next day after 3.5 hours working through every angle of planning how the wall tile should go in, I started. 7 hours later, I get the back wall of the shower done. It is a really good feeling. Time for wine on the patio, then dinner. Tomorrow I continue. Pause on the pick below and you'll see how the tiling progressed.
See those tiles that frame the 'Durock'? Setting the mortar for those frame tiles (called 'liners') was like filling celery with cream cheese. Yum!
These are a bit over loaded. Eventually I figured out the right amount
of mortar so that there was not a lot oozing out when I applied it to the wall.
At the end of the evening, I definitely needed Advil. My back was killing me.
The next day I started late. It seemed I needed more planning time again. I knew that I really couldn't completely tile the side walls without finishing the shower step. The idea is to put vertical tiles on top of horizontal tiles so that water has less of a chance to drain down through the crack. It has to flow sideways first, so there is less chance of mold developing. That's my theory and I'm sticking to it.
I had been waiting to get quotes for a smooth solid surface material for the top of the step. Being in a hurry, I decided to use some of the accent floor tile and
Schluter edging material I already purchased. (I really hope I don't regret this.)
 |
| Still needs grout |
With the step done (except for grouting which I haven't done on any of the tile yet) I proceeded to tile the wall with the niche in it. I got to the top of the niche and decided to call it quits! Our shower guy had suggested I lower the niche at the point where my tiles end so that I don't have to cut tiny slivers of the tile at the top. More work and a smaller niche, but in the end I think it will look better.
 |
| Would you rather have these thin tile cuts... |
 |
| or a full row of tiles? I choose a full row. |
At some point, I ran out of mortar (used up 2 tubs) and sent Don out for more. He brought back gray instead of white. I went with it. I've been watching for oozing through the cracks, so I'm hoping it won't be an issue. I can't believe I've only gotten this far in two days. Here's where I've left the project probably until next weekend. Arggg!
Thanks for letting me share my progress on this challenge - my first tiling job. I hope to complete this soon. I can't wait for a real shower. Let me know about your bathroom remodel or your latest challenge. Misery loves company!
Until next time!!!


