Navigation Pages

Wednesday, July 2, 2014

Home Office - Odds and Ends and One Month to Go!


If you've been following along, let me know when you joined with a comment on this blog.  Which transformations have you seen...the Foyer? ...The Bathroom? ...or have you just started with the Home Office?  Whichever point you joined my challenge - WELCOME! 

These last few weeks have involved some tedious work which is not going to look like much progress.  Nevertheless, I will continue to report every other week as promised.  Here are some of the odds and ends that are bringing me closer to the end of this challenge.

Window Bench


I finished off the window bench with trim around the front and the installation of the decorative metal sheet.  I ended up putting my shredder under the bench since there is an outlet and space to spare, still allowing the heater vent to have room to push air into the room through the decorative metal.


My shredder inside the window seat bench

Closet Door Knob Jewelry


I didn't think I'd be able to use the door knobs I bought at World Market since the screws were too short.  Showing my mom my dilemma, she just started unscrewing it and we both saw that I just needed to shop for the right length screw.  Voila!  Jewelry for my closet doors!


Another Accessory in my Color Scheme


Found this pretty decorative dish/bowl that I couldn't pass up at the Agrace Thrift Store.  Can't think of a thing I'd use it for besides brightening a spot in the room.  Candy?  Paperclips?  Air?!


Drawers Painted and Installed


This dresser did not have nice wood to grab onto the paint.  I think I ended up with 4 coats of paint after sanding and using a deglosser ( which I'm convinced didn't work at all).  The end result works for me.


Coming up (in less than one month!)


I have a bunch of sewing to do to create valances over the window and over the old shelves on the other side of the room, and to create the white flowing curtains I envision will cover the clutter of the old shelves and also the window.  I still want to sew a window bench cushion, too.   I have to find a piece of art for the wall I'll be looking at when sitting at my desk.  I also have an entire wall to tackle that will be behind my chair and one of the first views seen when walking in the room.  My idea has always been to add a cork board with some decorative twist yet to be settled on.  Here are a couple of ideas:


For now, let's enjoy the holiday our fore fathers helped us achieve - Happy Independence Day!


Friday, June 20, 2014

Home Office - Anxious to get to the pretty stuff

Summer is finally here in Wisconsin!  It is getting harder to work on the inside when so much is growing on the outside.  Even so, I'm forging ahead.  My room has an energetic feel to it, even if I don't!


I left you last with the building of my file cabinet/shelving units.  I'm still in the process of trimming them out with wood strips to make them look semi-built-in.  In the meantime, I added a window bench.  One of the challenges with this bench is that there is a heating vent and an electrical outlet on the wall below the window.


I built a frame out of 2 x 4's.  I covered the top with 2 pieces of pine.  The back part is only 3 inches wide by 38 inches.  The front is 14 by 38.  Some day I may connect the two with a small piano hinge so I can access the wall outlet.  For now, I just have the boards sitting on top of the frame.


I stained the top of the cabinet which is made of 2 10 inch pieces of 1 inch pine.  I used two stains.  One is a Gel Stain in Walnut.  The other is a regular stain in Red Chestnut.  I layered these on about 2-3 times to come up with a color that very closely matches my desk finish.


I finished installing my base boards and much to my daughter's dismay I put them on both the wall and the bottom edges of the cabinets and window seat.  I still think it makes it look more built in.


I will add a decorative metal sheet on the front side of the bench so air can flow through from the heater vent.


Now on to the even more fun stuff - Accessory shopping.  I did some shopping in my home looking at pictures my daughter painted.  Not sure what I'm going to pick, but here are some examples:


I found the striped pillows at Pier 1 and the buttoned pillow at World Market.  I should have started shopping at World Market as their prices are more reasonable than Pier 1.  I still love both stores.


Unfortunately, I cannot keep these door knobs intended for the closet doors.  The screws are not long enough to fit all the way through.


I have just under $100.00 left of my $3000.00 budget which was spread across 3 rooms.  I think my budget is doing great.  There are some things I want that just won't make it into this challenge, but I still think I'll end up with 3 rooms I love.  As for the time left to finish - that is going quickly.  If you haven't seen it already, take a look at the countdown on the left side of this blog page.  Yikes!  We better get shopping! 

Here are some links I've enjoyed browsing -


Enough shopping!  I have to get to work.  More building, painting, sewing, breathing, etc.  Time is ticking.  See you in two weeks.


Friday, June 6, 2014

Home Office - Building from the ground (floor) up

I had the best intentions to have a big build during the previous weekend since spending time at the lake cottage was planned for this weekend.  Unfortunately, I ended up with a fever and was down and out for 2 nights and a day or so.  I was able to get moving enough to put my file cabinet/shelving system together, but before I show you the results, you have to see how our cat, Woodstock, appreciates the new bathroom sink!


The plan for the home office is to have 2 file cabinets made from 2 dressers with 4 drawers each topped with shelving.  I transformed the dressers into file cabinets in my last post.  I bought 9 1 x 10 pine boards, 6 feet in length for the shelves.  I painted them with Dove White paint before putting them together.

Leisure painting in the garage


I built a base for each file cabinet using 2 x 4's.

I then positioned the cabinet to the front of the base and screwed the cabinet to the base.


I added 3/4 inch plywood painted Dove White to the sides of the cabinets flush with the front.

back view
side view
I topped the cabinet with unpainted plywood.  The reason for cladding the cabinet with wood is to add extra support for the shelving that will sit on top of the file cabinets.  These cabinets were purchased as dressers from a St Vincent De Paul Store for the size of their drawers and their potential to be turned into the lateral file cabinets I've been looking for for some time.  Although they will hold my files, I wasn't so sure they were sturdy enough to hold additional shelving as well.
front view

Now, of course, this wasn't an error free process.  Once the cabinet was clad with supporting plywood, I intended to paint the entire cabinet white and top it with a piece of solid wood that would be stained a dark wood stain to match my desk.   These pictures from my last post show my error in determining whether a door is solid wood or hollow core.

I thought that the thin wood outline on a heavy door meant it was veneer over solid wood.

Not solid wood!  Just a bunch of strips making this door heavy.


The door halves sat on top of my cabinets for sometime while I tried to consider how I could trim out the units to make them look like a custom cabinet rather than a jumble of wood.  My faithful advisor has been home from Grad School to help discuss the pros and cons of my ideas and we both came to the conclusion that I needed to scrap the hollow core door pieces and purchase some real wood.
 

As it turns out, I found 2 6 foot pieces of 1 x 10 pine in our garage under a bunch of other wood.  This made all my ideas for trimming the units with other wood I had on hand make sense, so I was able to proceed.


I placed the newly found pine on top of the cabinets and then topped them with a shelving unit to see how everything would look.  Nothing here is connected together and the final paint touch ups and staining of the new pine topper are not done, but it shows that the end is near as I'm liking the result so far.


The drawers will be painted white

I'm interested in hearing from anyone reading this what items I should place on these shelves.  How should I inject color?  Should I add books, office supplies, or decorative pieces.  What would you do?


Thursday, May 22, 2014

Home Office - Bits and Pieces

My last post introduced the last phase of this challenge, my home office.  It was quite a mess.  I finally cleaned the room out.  I trashed a good amount of unusable stuff and have a small amount of old software I plan to give to Goodwill - games, tutorials for typing, home decor apps, etc.  They are probably also unusable, but at least it will be out my house and someone else can decide on their use.  The rest of this post is filled with the bits and pieces of what I needed to do to get this room started.

Carpet Indentation Fix

What I was left with are a bunch of carpet dents where furniture pieces stood for quite some time.  One solution is to set ice cubes along the indentations and after they melt, brush/comb out the carpet fibers.  This worked well for me.


Dresser Transformation

After everything was out of the room and the carpet dents were removed, I needed to start working on changing my two thrift store dressers into file cabinets.

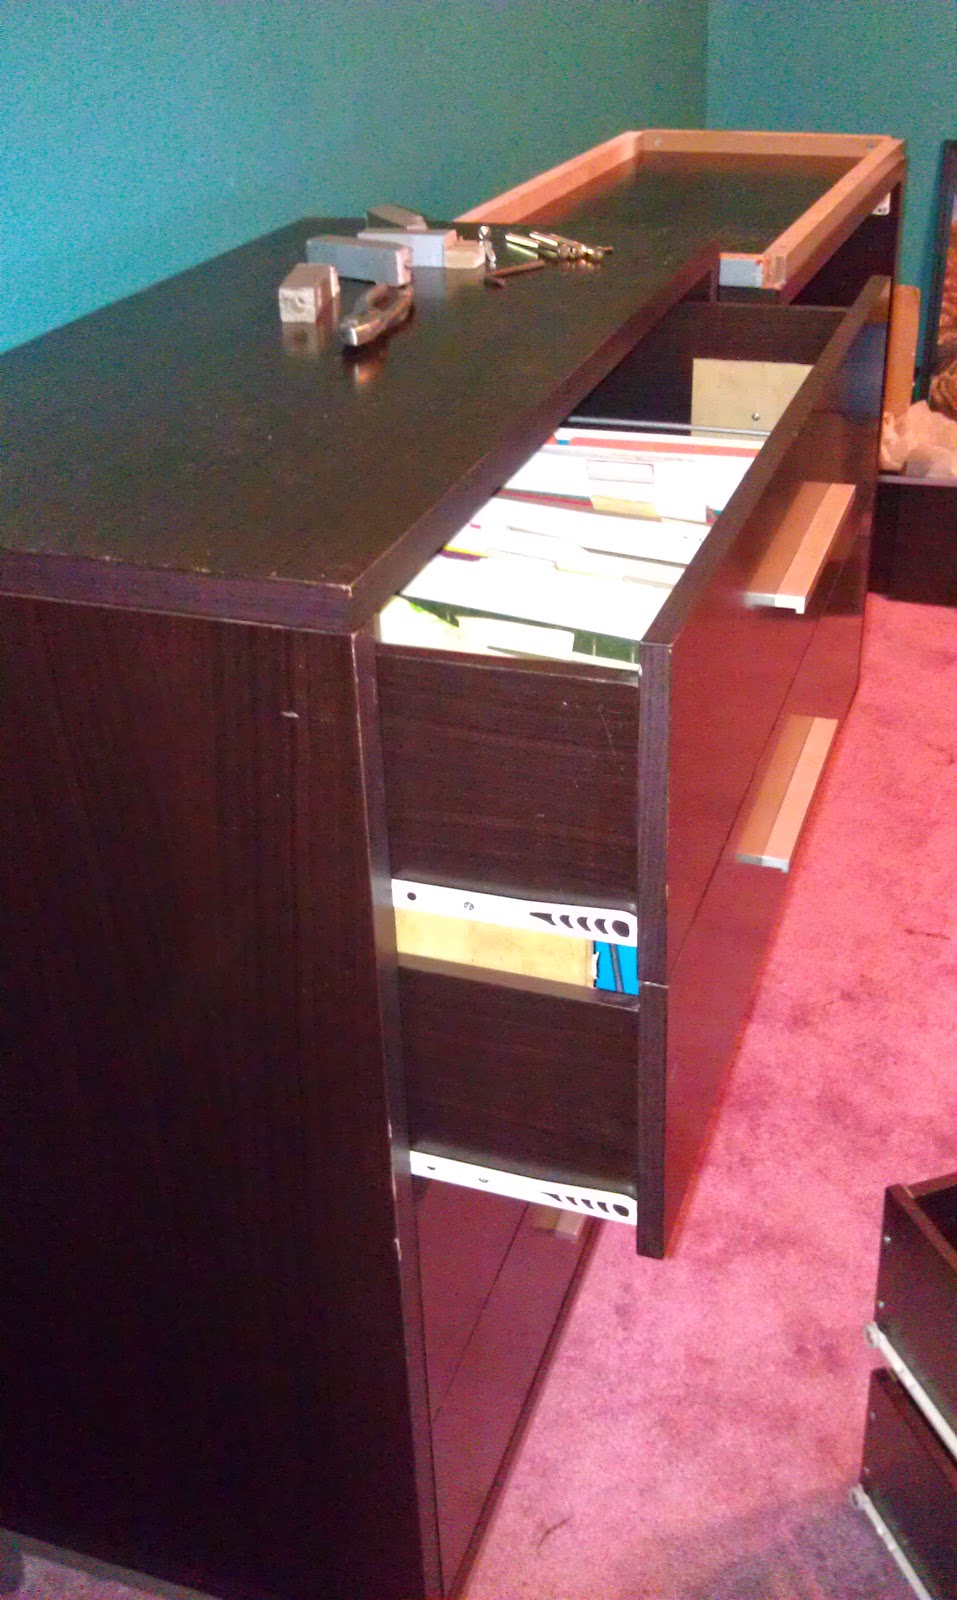
The goal was to fuse two drawers into one to make room for hanging files.  I needed to break out the bottom of the 1st and 3rd drawers so that I could drop my hanging files into the 2nd and 4th drawers.
 

I tossed out the intentionally broken thin bottom pieces.


The issue I ran into (besides 'help' from our cat) was that the drawer fronts were higher than the backs.


I added a 1.5 inch piece of wood at the back and fastened the top and bottom together so that two drawers made up one.


The end result: 2 drawers working as one.

Installing the dresser transformed into a file cabinet

The cabinets are only 15.5 inches deep.  I intend to add a shelving unit on top of each cabinet.  In order to have a decent amount of space in front of the shelves, I need to bring the dresser/file cabinet out a few inches from the wall so that I can have a 10 inch shelf on top with about 12 inches from the front of the shelf to the front of the cabinet.  I built a base out of 2 by 4's and I plan to anchor the cabinet to the base at the desired depth.  The space will be covered with a sheet of plywood that will clad each side of the base unit.


I plan to put base board in front and maybe around the cabinet - currently just shown in front.

My goal is to have one horizontal surface between the cabinet and the shelves going on top which is stained the same color as my desk.  Of course, hard wood is my top choice, and of course, it is out of my budget.  I went to the Habitat Restore with hopes of finding that piece of wood in my budget.  I looked at their scrap hardwood but they know what that's worth, so again - out of budget.  I looked at all kinds of things that could potentially be taken apart to produce the pieces I needed, such as, doors, cabinets, tables, and other furniture.  I found a door with a nice looking grain that was quite heavy.  My gut told me it was a hollow core door, but the weight made me ask.  They went back and forth and finally said it was a solid door.  I asked them to cut it in half so it would fit in my car.

SURPRISE!  It was a hollow core door with a bunch of spacers.  I should have gone with my gut.


For now, it stands unfinished, clad with plywood on each side and under my top 'door' piece.  The intent is to trim it out with wood painted white except for the 'door' piece.  That will be trimmed with a molding and stained the same color as the 'door' part.

Can you picture it yet?

PAINT

The paint swatches expanded since my last post.  I was trying to figure out if I wanted a more subdued color scheme.   I thinned down the large sample with a 1:1, 2:1, 3:1 mix using SW Swan Wing and painted samples respectively to the right on top.  I did the same with the 'Drizzle' color progressing to the left.  

 
In the end, I went with Mariner as is.
Old yellow will be painted over white.
Trim Color : Glidden Dove White


Lighting

I had a vision for lighting that included a $700.00 pottery barn light and other variations that might actually fit my small 10 by 10 room.  I found a good, old 1980's brass pendant light at the Habitat Re-Store.


I spent a bunch of time taping both the outside and inside with painter's tape in preparation for spray painting.  I took out the chandelier part to paint that separately and pulled out the wires and hanging chain.  I will likely only use a couple of chain links to keep this close to the ceiling.


I sprayed it with my favorite 'Oil rubbed Bronze' spray paint.


The end result:  a more contemporary look.

One of my inspiration lights- close!

I hope you join me in a couple of weeks for more Home Office progress.  


 Have a wonderfully happy and safe Memorial Day weekend.