Navigation Pages

Showing posts with label lighting. Show all posts

Wednesday, July 16, 2014

Home Office - Valances and Curtains and Lights - Oh My!

You've likely heard Judy Garland chant "Lions and Tigers and Bears - Oh My" when she walked the yellow brick road in The Wizard of Oz.  These last two weeks I've been walking down the path to the end of this challenge.  Specifically, I worked on Valances and Curtains and Lighting.  One of my primary goals was to hide our bookshelf clutter behind flowing white curtains.  Mission accomplished.  Here's what I did:

Valances

Structure
I used anchors and screws and wood (oh my - sorry couldn't resist!) to install a frame for my valances on the ceiling.  I attached some wood vertically from the ceiling to the book shelves below set back just a few inches from the valance frame.  I'll need this to add the curtain rod brackets for the floor length curtains described below. 


Fabric
I used a pretty organic printed fabric for the front of the valances which basically drove the color palette of this room.  I lined it with a plain teal color fabric.  I covered cording with the same teal fabric to add a neat edge at the top.  I didn't have enough material to add cording all around.  I need to save some for the window bench cushion I plan to sew.


Installation
I installed the valance with velcro.  I used the sticky back 'hook' side on the wood frame and the sew on 'loop' side on the fabric.  The valance is about 18 inches long and about 93 inches wide in the front with a 17 inch return to the wall on the right side.  I have a shorter return on the left side since no one will see that end. 

Velcro pinned to liner at the top under the cording.

Curtains

I planned to have full length curtains on both the window and in front of the book shelves.  After making the curtains for the bookshelves with 120 inch wide white fabric, I ended up with only enough to make cafe style curtains.  I'm liking them.

Curtains over shelves

100 inches long - I needed to measure and cut on my living room/foyer floor.


Both sets of curtains needed to be easy-breezy to open and close.  I hand sewed 42 wooden rings purchased at a St. Vinny's store in Madison to the bookshelf curtains.  I used clip on rings for the window cafe curtains.


One thing I am fortunate to have for my sewing machine made hemming curtains very easy.  It is a special blind hem stitch foot.  I followed instructions on how to fold the fabric and just sewed along the fold.  The end result was a machine sewn hem, with just an occasional stitch along the front side barely showing.


Lighting

I bought this light some time ago and in a prior post showed you that I spray painted it to make it a touch less 1980's!  It is installed!  There are 6 candle type light bulbs and one bulb pointing down.  With everything on, I can heat the whole house!  I've unscrewed every other candle bulb and thankfully, with a turn of a switch I can only light up those.  That's where I leave it, so the wall switch just turns those on.  Another turn and both the candle lights and the bulb pointing down are on.  One more turn, and only the bulb pointing down is on.  A final turn and all lights are off.  It turns out that the bulb pointing down is a very good option to be on when reading fine print or sewing detail stitches.

Light off

Light on


One more blog post for this challenge.

In my next post, I'll hopefully be able to pull this room all together with accessories, wall decor,  and budget, along with before and after pics.  I was able to work mostly weekends on the first 2 rooms of the challenge, but this room being done during summer hours has pushed me to work weekdays.  It's all good because I already can't wait to use the office on a day to day basis as it was intended.


Thursday, May 22, 2014

Home Office - Bits and Pieces

My last post introduced the last phase of this challenge, my home office.  It was quite a mess.  I finally cleaned the room out.  I trashed a good amount of unusable stuff and have a small amount of old software I plan to give to Goodwill - games, tutorials for typing, home decor apps, etc.  They are probably also unusable, but at least it will be out my house and someone else can decide on their use.  The rest of this post is filled with the bits and pieces of what I needed to do to get this room started.

Carpet Indentation Fix

What I was left with are a bunch of carpet dents where furniture pieces stood for quite some time.  One solution is to set ice cubes along the indentations and after they melt, brush/comb out the carpet fibers.  This worked well for me.


Dresser Transformation

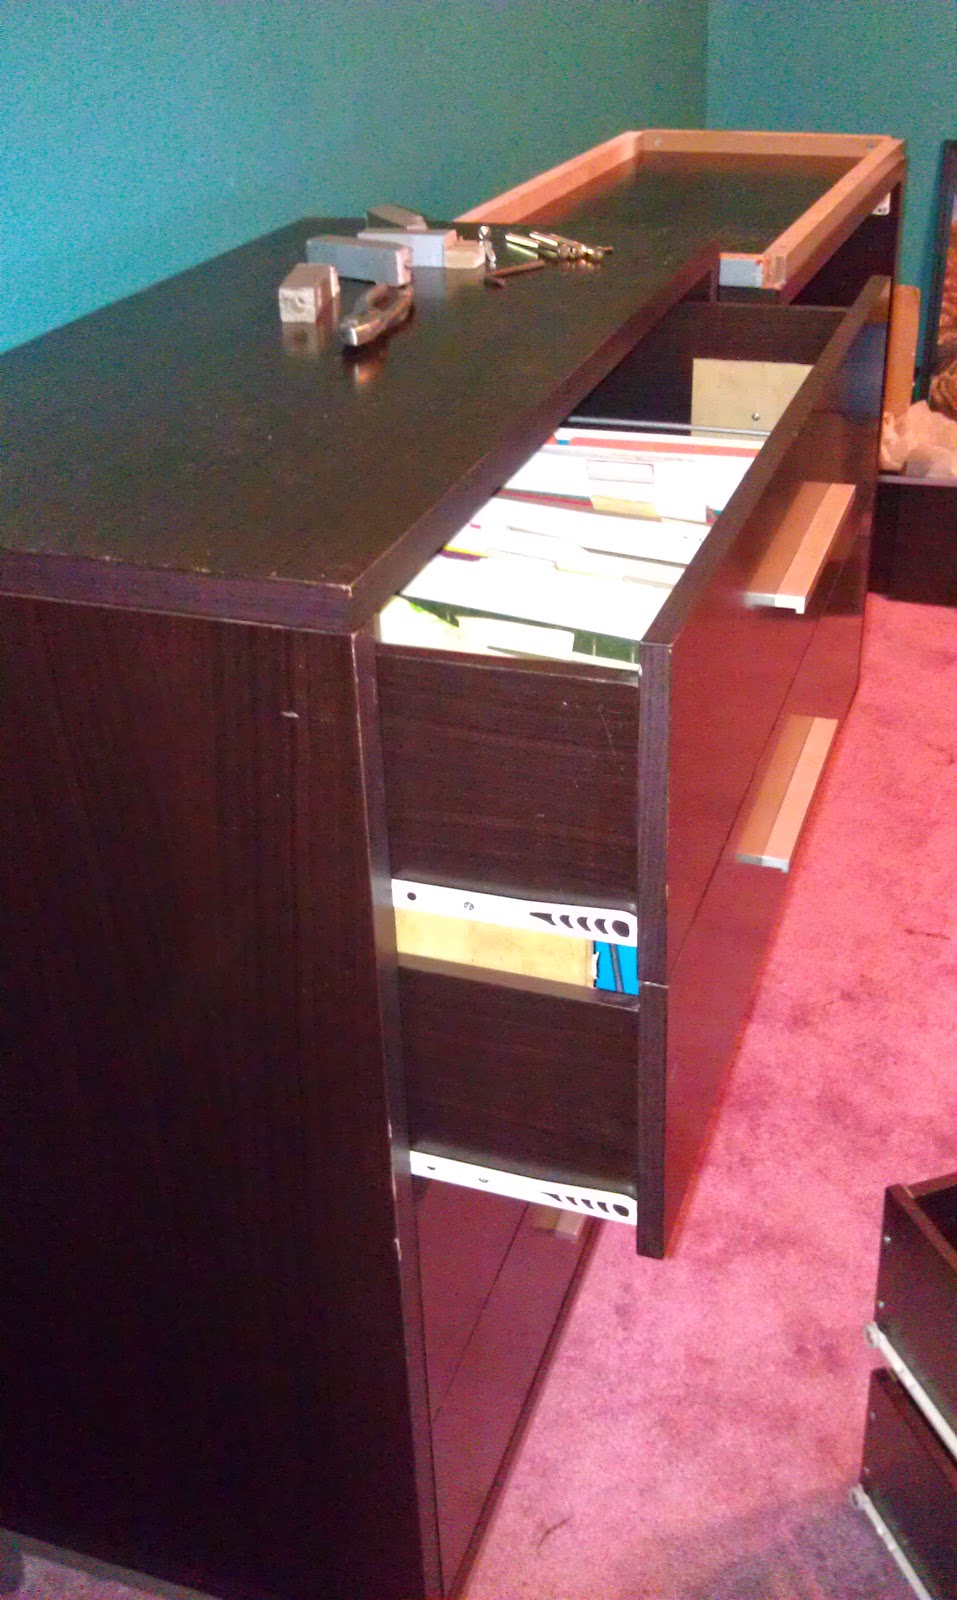
After everything was out of the room and the carpet dents were removed, I needed to start working on changing my two thrift store dressers into file cabinets.

The goal was to fuse two drawers into one to make room for hanging files.  I needed to break out the bottom of the 1st and 3rd drawers so that I could drop my hanging files into the 2nd and 4th drawers.
 

I tossed out the intentionally broken thin bottom pieces.


The issue I ran into (besides 'help' from our cat) was that the drawer fronts were higher than the backs.


I added a 1.5 inch piece of wood at the back and fastened the top and bottom together so that two drawers made up one.


The end result: 2 drawers working as one.

Installing the dresser transformed into a file cabinet

The cabinets are only 15.5 inches deep.  I intend to add a shelving unit on top of each cabinet.  In order to have a decent amount of space in front of the shelves, I need to bring the dresser/file cabinet out a few inches from the wall so that I can have a 10 inch shelf on top with about 12 inches from the front of the shelf to the front of the cabinet.  I built a base out of 2 by 4's and I plan to anchor the cabinet to the base at the desired depth.  The space will be covered with a sheet of plywood that will clad each side of the base unit.


I plan to put base board in front and maybe around the cabinet - currently just shown in front.

My goal is to have one horizontal surface between the cabinet and the shelves going on top which is stained the same color as my desk.  Of course, hard wood is my top choice, and of course, it is out of my budget.  I went to the Habitat Restore with hopes of finding that piece of wood in my budget.  I looked at their scrap hardwood but they know what that's worth, so again - out of budget.  I looked at all kinds of things that could potentially be taken apart to produce the pieces I needed, such as, doors, cabinets, tables, and other furniture.  I found a door with a nice looking grain that was quite heavy.  My gut told me it was a hollow core door, but the weight made me ask.  They went back and forth and finally said it was a solid door.  I asked them to cut it in half so it would fit in my car.

SURPRISE!  It was a hollow core door with a bunch of spacers.  I should have gone with my gut.


For now, it stands unfinished, clad with plywood on each side and under my top 'door' piece.  The intent is to trim it out with wood painted white except for the 'door' piece.  That will be trimmed with a molding and stained the same color as the 'door' part.

Can you picture it yet?

PAINT

The paint swatches expanded since my last post.  I was trying to figure out if I wanted a more subdued color scheme.   I thinned down the large sample with a 1:1, 2:1, 3:1 mix using SW Swan Wing and painted samples respectively to the right on top.  I did the same with the 'Drizzle' color progressing to the left.  

 
In the end, I went with Mariner as is.
Old yellow will be painted over white.
Trim Color : Glidden Dove White


Lighting

I had a vision for lighting that included a $700.00 pottery barn light and other variations that might actually fit my small 10 by 10 room.  I found a good, old 1980's brass pendant light at the Habitat Re-Store.


I spent a bunch of time taping both the outside and inside with painter's tape in preparation for spray painting.  I took out the chandelier part to paint that separately and pulled out the wires and hanging chain.  I will likely only use a couple of chain links to keep this close to the ceiling.


I sprayed it with my favorite 'Oil rubbed Bronze' spray paint.


The end result:  a more contemporary look.

One of my inspiration lights- close!

I hope you join me in a couple of weeks for more Home Office progress.  


 Have a wonderfully happy and safe Memorial Day weekend.