Navigation Pages

Thursday, May 22, 2014

Home Office - Bits and Pieces

My last post introduced the last phase of this challenge, my home office.  It was quite a mess.  I finally cleaned the room out.  I trashed a good amount of unusable stuff and have a small amount of old software I plan to give to Goodwill - games, tutorials for typing, home decor apps, etc.  They are probably also unusable, but at least it will be out my house and someone else can decide on their use.  The rest of this post is filled with the bits and pieces of what I needed to do to get this room started.

Carpet Indentation Fix

What I was left with are a bunch of carpet dents where furniture pieces stood for quite some time.  One solution is to set ice cubes along the indentations and after they melt, brush/comb out the carpet fibers.  This worked well for me.


Dresser Transformation

After everything was out of the room and the carpet dents were removed, I needed to start working on changing my two thrift store dressers into file cabinets.

The goal was to fuse two drawers into one to make room for hanging files.  I needed to break out the bottom of the 1st and 3rd drawers so that I could drop my hanging files into the 2nd and 4th drawers.
 

I tossed out the intentionally broken thin bottom pieces.


The issue I ran into (besides 'help' from our cat) was that the drawer fronts were higher than the backs.


I added a 1.5 inch piece of wood at the back and fastened the top and bottom together so that two drawers made up one.


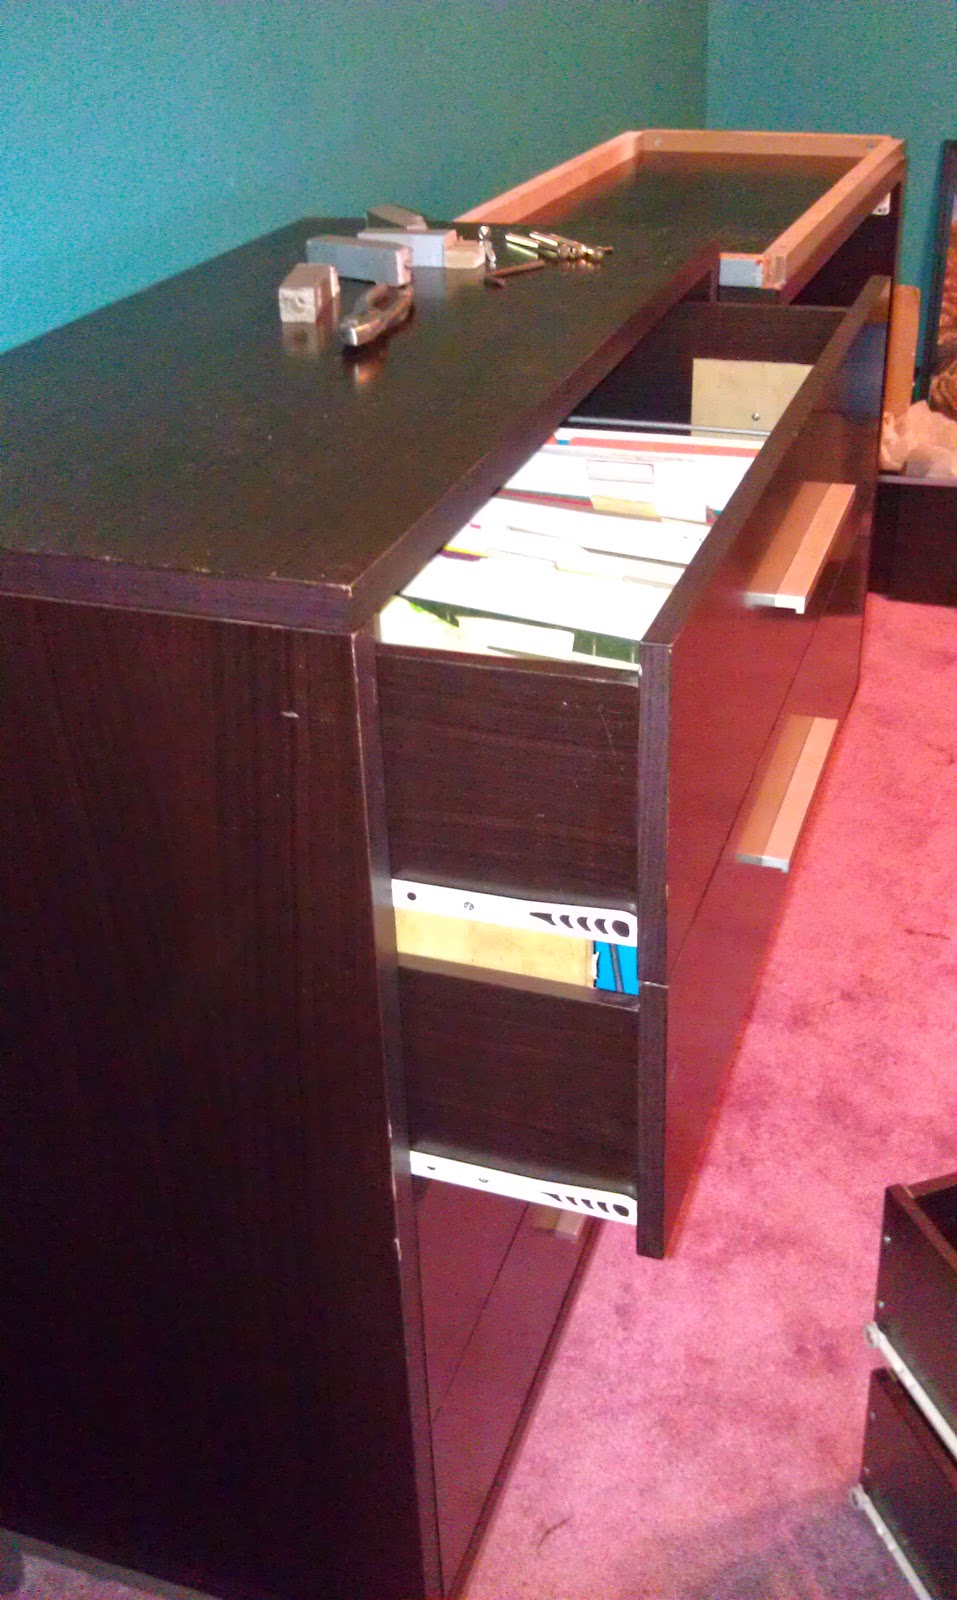
The end result: 2 drawers working as one.

Installing the dresser transformed into a file cabinet

The cabinets are only 15.5 inches deep.  I intend to add a shelving unit on top of each cabinet.  In order to have a decent amount of space in front of the shelves, I need to bring the dresser/file cabinet out a few inches from the wall so that I can have a 10 inch shelf on top with about 12 inches from the front of the shelf to the front of the cabinet.  I built a base out of 2 by 4's and I plan to anchor the cabinet to the base at the desired depth.  The space will be covered with a sheet of plywood that will clad each side of the base unit.


I plan to put base board in front and maybe around the cabinet - currently just shown in front.

My goal is to have one horizontal surface between the cabinet and the shelves going on top which is stained the same color as my desk.  Of course, hard wood is my top choice, and of course, it is out of my budget.  I went to the Habitat Restore with hopes of finding that piece of wood in my budget.  I looked at their scrap hardwood but they know what that's worth, so again - out of budget.  I looked at all kinds of things that could potentially be taken apart to produce the pieces I needed, such as, doors, cabinets, tables, and other furniture.  I found a door with a nice looking grain that was quite heavy.  My gut told me it was a hollow core door, but the weight made me ask.  They went back and forth and finally said it was a solid door.  I asked them to cut it in half so it would fit in my car.

SURPRISE!  It was a hollow core door with a bunch of spacers.  I should have gone with my gut.


For now, it stands unfinished, clad with plywood on each side and under my top 'door' piece.  The intent is to trim it out with wood painted white except for the 'door' piece.  That will be trimmed with a molding and stained the same color as the 'door' part.

Can you picture it yet?

PAINT

The paint swatches expanded since my last post.  I was trying to figure out if I wanted a more subdued color scheme.   I thinned down the large sample with a 1:1, 2:1, 3:1 mix using SW Swan Wing and painted samples respectively to the right on top.  I did the same with the 'Drizzle' color progressing to the left.  

 
In the end, I went with Mariner as is.
Old yellow will be painted over white.
Trim Color : Glidden Dove White


Lighting

I had a vision for lighting that included a $700.00 pottery barn light and other variations that might actually fit my small 10 by 10 room.  I found a good, old 1980's brass pendant light at the Habitat Re-Store.


I spent a bunch of time taping both the outside and inside with painter's tape in preparation for spray painting.  I took out the chandelier part to paint that separately and pulled out the wires and hanging chain.  I will likely only use a couple of chain links to keep this close to the ceiling.


I sprayed it with my favorite 'Oil rubbed Bronze' spray paint.


The end result:  a more contemporary look.

One of my inspiration lights- close!

I hope you join me in a couple of weeks for more Home Office progress.  


 Have a wonderfully happy and safe Memorial Day weekend. 


Thursday, May 8, 2014

Home Office - Let's get started!

Last, but not least, the final portion of my challenge is my home office/den.  If you only knew all the renditions I've gone through in setting a direction for this room's makeover!  My husband is exhausted with all the changes I've made him review for me. I started thinking about this a long time ago, but did some concrete space planning during my first class toward getting my Professional Home Decorating certificate.

This is not the final layout

I won't be making a shade based on my last attempt!
During my Home Decorating 1 class, this was my inspiration...a Pottery Barn catalog page showing white furniture and plenty of cork boards for viewing design options.  I was drawn to the colors because they are part of the color scheme I currently use at home - rusts, greens, and tans.  The white is a refreshing change from the other wood tones I've been working with in this challenge.


My current home office is quite embarrassing.  I've been behind on filing and general up keep.  We have been using this room as a dumping ground ever since we got a laptop.  We have 3 bookcases that my family shares.  We each have our own bookcase and the idea is that each of us is responsible for the upkeep the way we want it done.   Note that this is the view that any neighbor looking through our window on an afternoon walk would see.  Goal #1 - Make this mess disappear!


I've been online searching, searching, searching, (and did I say searching?) for fabrics to carry out the vision inspired by my inspiration room.    Here are the main websites I searched that I think are very good, reasonably priced, fabric sources:
 http://www.onlinefabricstore.net
http://warehousefabricsinc.com 
http://www.buyfabrics.com

During my search, I wanted to find a fabric with at least 3 colors so I had something to work with to pick out paint colors and other fabrics.  I looked at so many fabrics that I had to start an MS Word doc to save the images and links so that I could organize them into combinations I might be able to use.

Sticking with the warm colors for the most part I put this together:
I like this combination quite a bit, but it seems far too vibrant compared to my Pottery Barn inspiration picture.  I found a picture which really looks very professional and I thought this was the way to go, but Harmony and Don said it looked like a lawyer's office, not a home designer's office:

I'm still in love with this look, but I'm trying to take advise from those that I know love me and have my best interests at heart.    Never the less, Goal #2 - Make this office look professional.  So I continued my pursuit.  I ordered a few samples of fabric and found one I liked.

Evelynne Baltic

Now on to choosing a paint color - so many decisions and so little time.   Okay, I just can't make up my mind.
Drizzle, Mariner, Quietude, Watery

Trying to pull out a color from a Pier 1 flyer
I narrowed it down to Drizzle and Mariner...Sophisticated or Vibrant?  Too dark, Too bright?  Arrrrgh!
Do you get the idea, that I've moved completely away from the warm colors and am now contemplating cool colors?  I also considered giving up this fabric completely and going with doing a wall stencil.  I think this stencil is very cool and thought of mimicking a painting by using multiple colors as a base, with white for the bark.  You can find the stencil at Cutting Edge Stencils.

Painting inspiration

Stencil with blue background
I sat in the empty office, staring at the paint samples, and a painter's tape mock up of the outline for the shelving I plan to build/buy.  If I had a heftier budget, I may have been able to move forward with one of the original ideas I had in mind.  There is also a time factor and based on the fact that this is the season for visiting our lake cottage, I have only about 5 weekends I'm willing to schedule strictly for working on this room.

I was planning on using the fabric I picked for draperies flanking plain white drapery to cover up the bookcases, but the amount of fabric I needed put me over budget.  I finally made up my mind and pushed myself forward by ordering the material to make a padded valance over the 3 bookcases and over the window instead of drapery.  I also ordered the plain white fabric for the drapery I still intend to use to cover the bookcases and the window.

This new concept is far from the one I started with, but it is now in motion, so wish me luck.  The paint color is my biggest worry.  Goal #3 - Make this office inviting so that it is used as an office rather than a dumping ground.

Not sure which light I'll end up with.  First choice is the one on the right - Cost: over $700!